
How to Make a Stone Age Dwelling


Prehistory - Life in the Stone Age
One great thing about being a teacher is that you get to participate in some fantastic projects. Projects that are not exciting for you (the teacher), but also the children you are teaching.
Over the past few weeks my class has been excited about learning more about Prehistory and in particular life during the Neolithic and Palaeolithic periods.
Developing and supporting inquisitive minds throughout our latest topic has been a really interesting task, as the children have not only been excited and curious, but also delighted to have the opportunity to learn more about the past.
Through a combination of innovative teaching methods. Knowledge gathering, supported with a creative approach, using creative art techniques and the use of technology through iPads and Google Classroom. My classroom has been transformed and inspired my pupils to create some amazing and imaginative work.
In this particular blog post, I hope to unearth some clues from the past, by explaining more about how we made a Prehistoric Cave Dwelling.

What was life like during the Stone Age?
Well... that is a difficult question to answer, but through this enquiry, we have been looking at how the tools people used, homes and farming techniques, from this period of time influenced peoples lives and established its mark in history.
What was the Stone Age?
The Stone Age was a time thousands of years ago, when humans lived in caves and the wider landscape. Life was simple back then and there were only two main things for people to do – to protect themselves from the wild animals and to hunt and gather food. It started almost with the evolution of mankind.
For both purposes, people began to make primitive tools from stone. With the oldest stone tool that we have as evidence being almost 3.4 million years old. It was discovered by an archaeologist in Lower Awash Valley in Ethiopia, Africa.
Stones were also used to make fire and sometimes for part of the buildings they lived in. During these times, humans began to use stone for almost everything they did, hence the name Stone Age.
To look at a timeline of this period click here.
The Stone Age went on for a long period of time. In the beginning, Stone Age rock shelters were prevalent and a primitive place for people to live and shelter. In times of trouble, early humans would go into hiding and use the caves as a form of protection.
As an example, In India, the Bhimbetka rock shelters show the earliest signs of human life in this particular region. These caves are protected by UNESCO and are almost 30,000 years old. Some archaeologists and researchers have also discovered Stone Age art in several European caves.
The inside walls of these caves are awash with paintings of animals like horses, deer, and mammoths. Which I guess depict life during this time.
To recreate your very own cave paintings click here.

Stone Age Cave paintings
Hunter-gatherers often painted and engraved the inside of caves and huts. The Palaeolithic people decorated their cave walls either by carving or engraving them with sharp stones, or by painting them with pigment made from minerals. Red (rust) colours were obtained from the stones and black came from charcoal.
The colours were mixed with water to make paint. They were applied to the walls with either their fingers, fur or brushes made from twigs. The paintings often represented daily life such as men hunting, animals, women gathering crops.
In a previous lesson we created our own cave paintings using both coloured pencils and felt tips, but there are many other ways for you develop your ideas. This creative website shows how cave paintings can be made out of clay or at least painted on to clay. Click here to find out more about Stone Age paintings and how to make your own clay painting.
Primitive Dwellings
During our lessons will learn how our human ancestors during this age lived in caves, as a form of shelter and many groups then used fire, as a source of heat, to cook with and also to help protect them from animals or other tribes.
Needles made out of bones and have been evidenced and discovered during this time. They would have been used to sew animal skins together to make clothing and for protection. Shelters were also further adapted and those made by Neanderthals showed that they lived in huts made of wood and had hearths to help contain a fire once it was lit.
Other huts were made of animal hides carefully positioned over wooden poles were also found inside a cave in Grotte du Lazaret in France. This was an interesting discovery and unique of its time.
Other huts, were further adapted and sometimes contained a divided living space (rooms) and a series of hearths for fires and these braced with mammoth bones have also been found in other areas of France, Ukraine, Siberia and Russia. To discover even more information about these discoveries you can click here. You can also click here to find out about how the huts and shelters evolved throughout the different ages.

How did we approach this task?
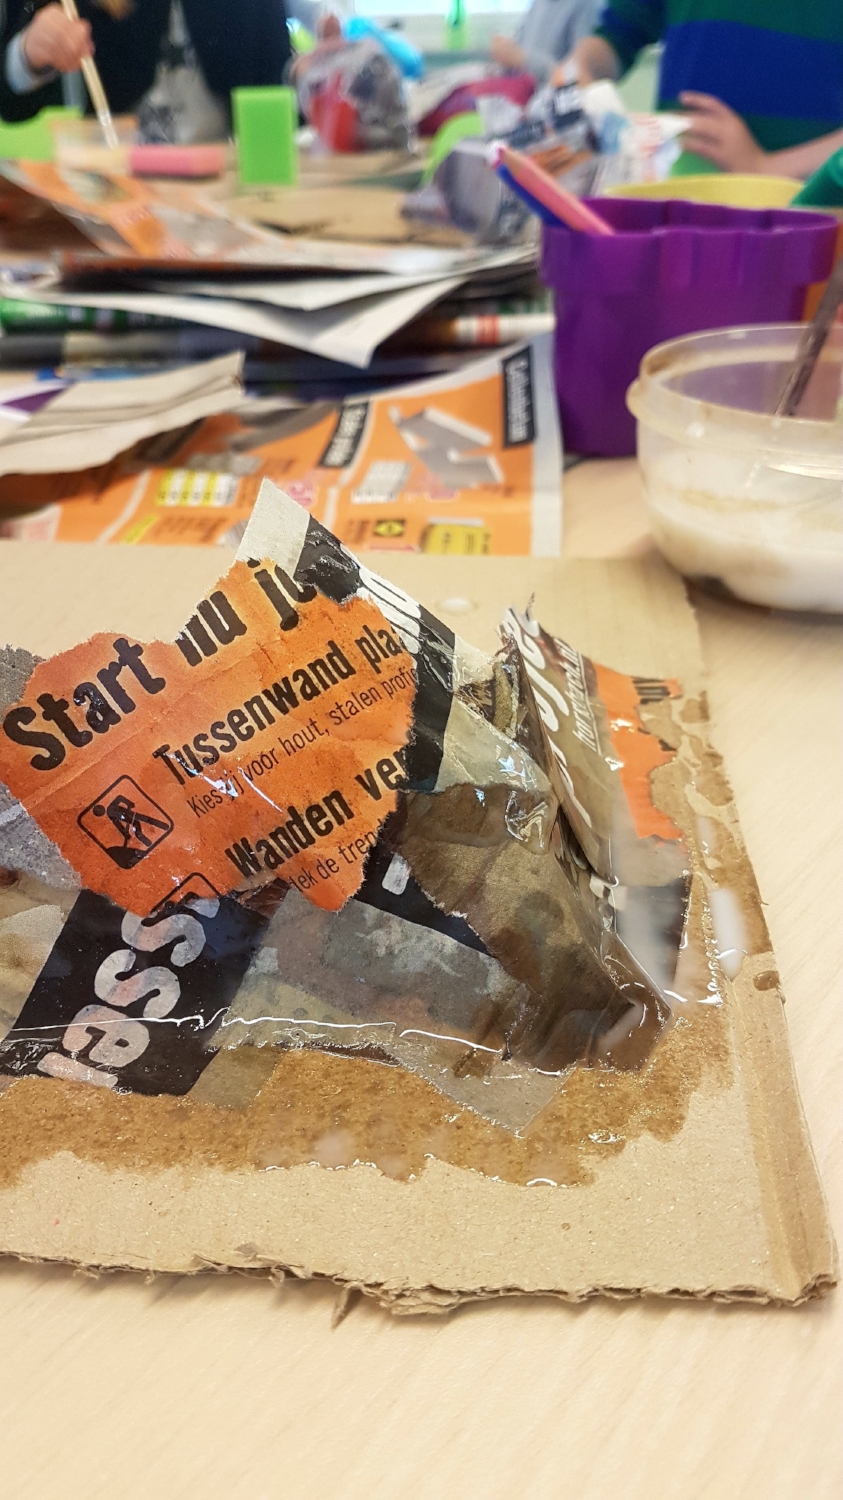
After completing some background research and lessons to support our interest and curiosity. I decided to follow my instinct and create a simple activity, where the children could not only enjoy it and develop new skills, but also complete the tasks in a fairly simple way.

The picture show the balloon being used to add shape and form.
With that in mind, I sourced a simple list of items to be used. Those items and materials could easily be found at home and were as follows:
A small piece of cardboard for the base.
Newspaper for the main papier mache structure.
PVA glue, mixed with water.
Paintbrushes.
Paints for colours.
Any additional items, like sponges, matchsticks, for aesthetics.
Keeping the list relatively short meant that we could focus on the end product more so than worrying about what was needed and perhaps wouldn't actually be used.
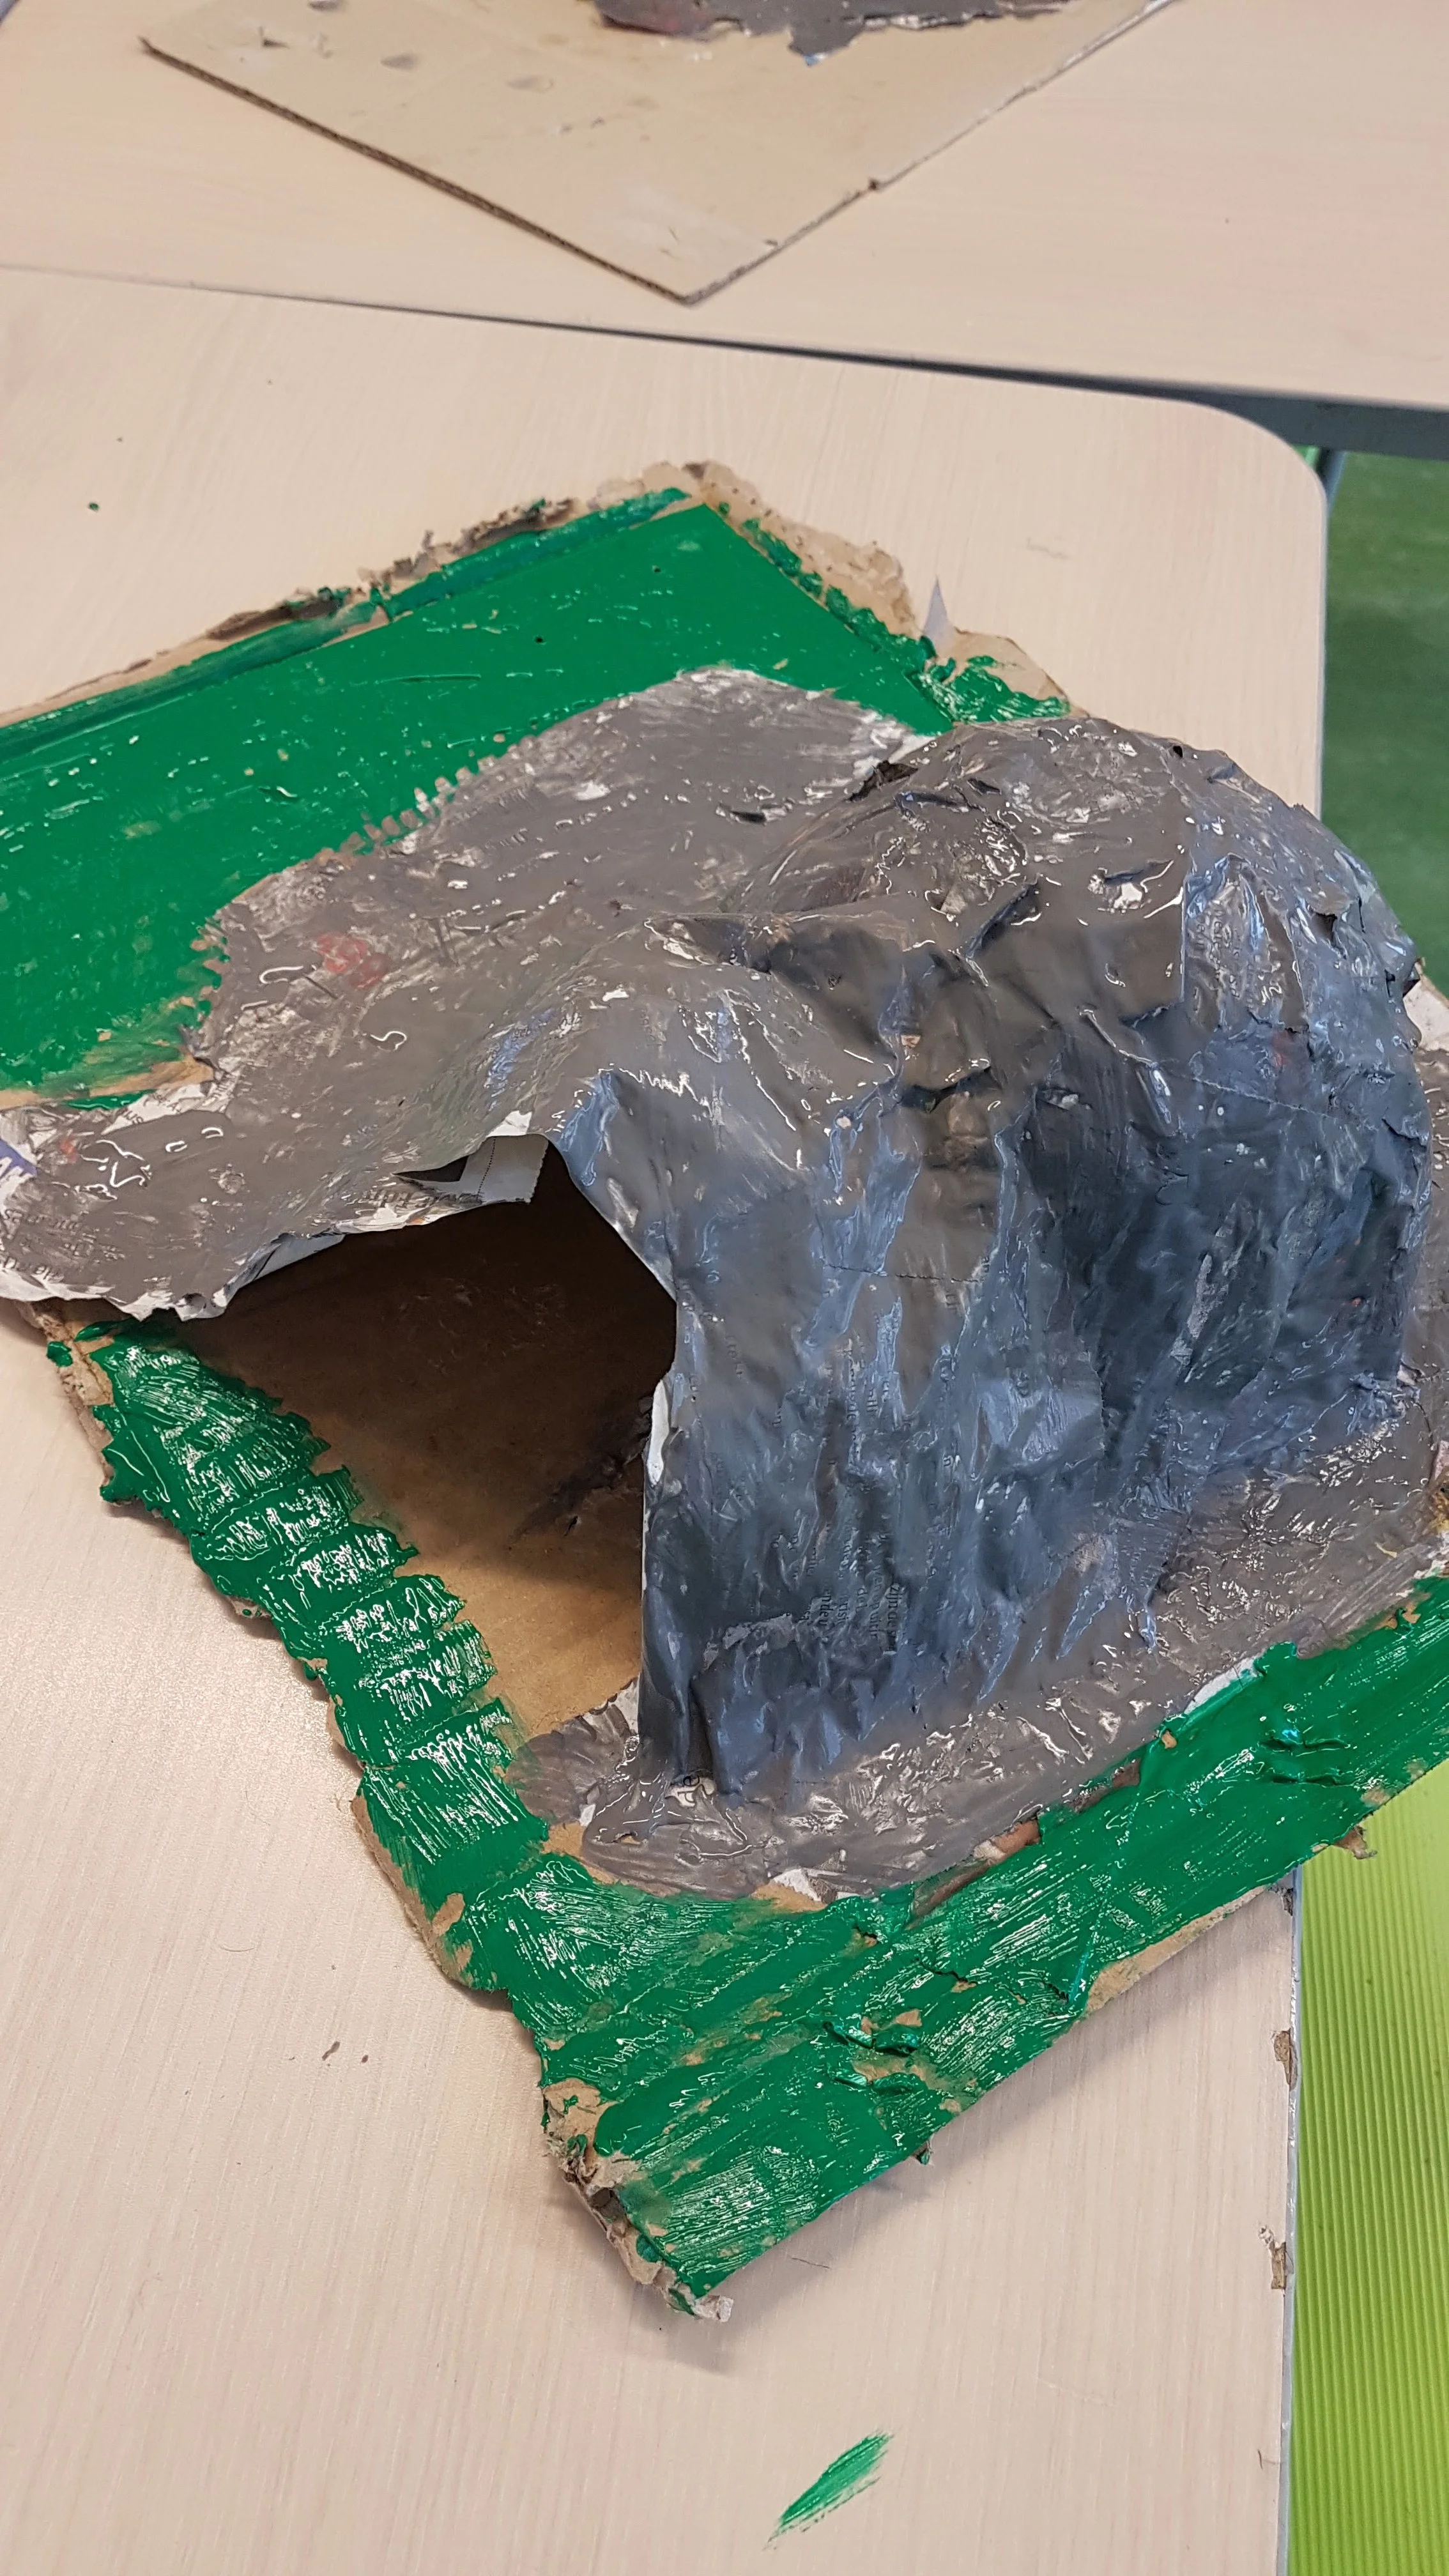
Some of the children began to use balloons as a supportive base and allow the overall shape of the cave to have some appropriate form and shape. This worked really well as they were able to then paper over the balloon with papier mache. Once the newspaper had dried and set hard, we could then burst the balloon and the overall shape would be maintained.

To further support their overall intentions some children began to roll up pieces of paper. This had a similar effect, to the balloon and was really great to see them taking the overall initiative.
The cave a had a natural stone feel to it and once the exterior was hard, the children could then easily take out the paper and the cave would keep its overall form.

In order to cover the balloon or paper structure. The children began to wet their newspaper with both water and glue.
This was perfect for binding the paper together and once it was hard it would provide a protective case for them to then paint over with appropriate colours.
To add extra strength to the model the children began to paint over the top and I suppose bring the whole thing to life. Allowing it to be more realistic and lifelike.
Our finished work
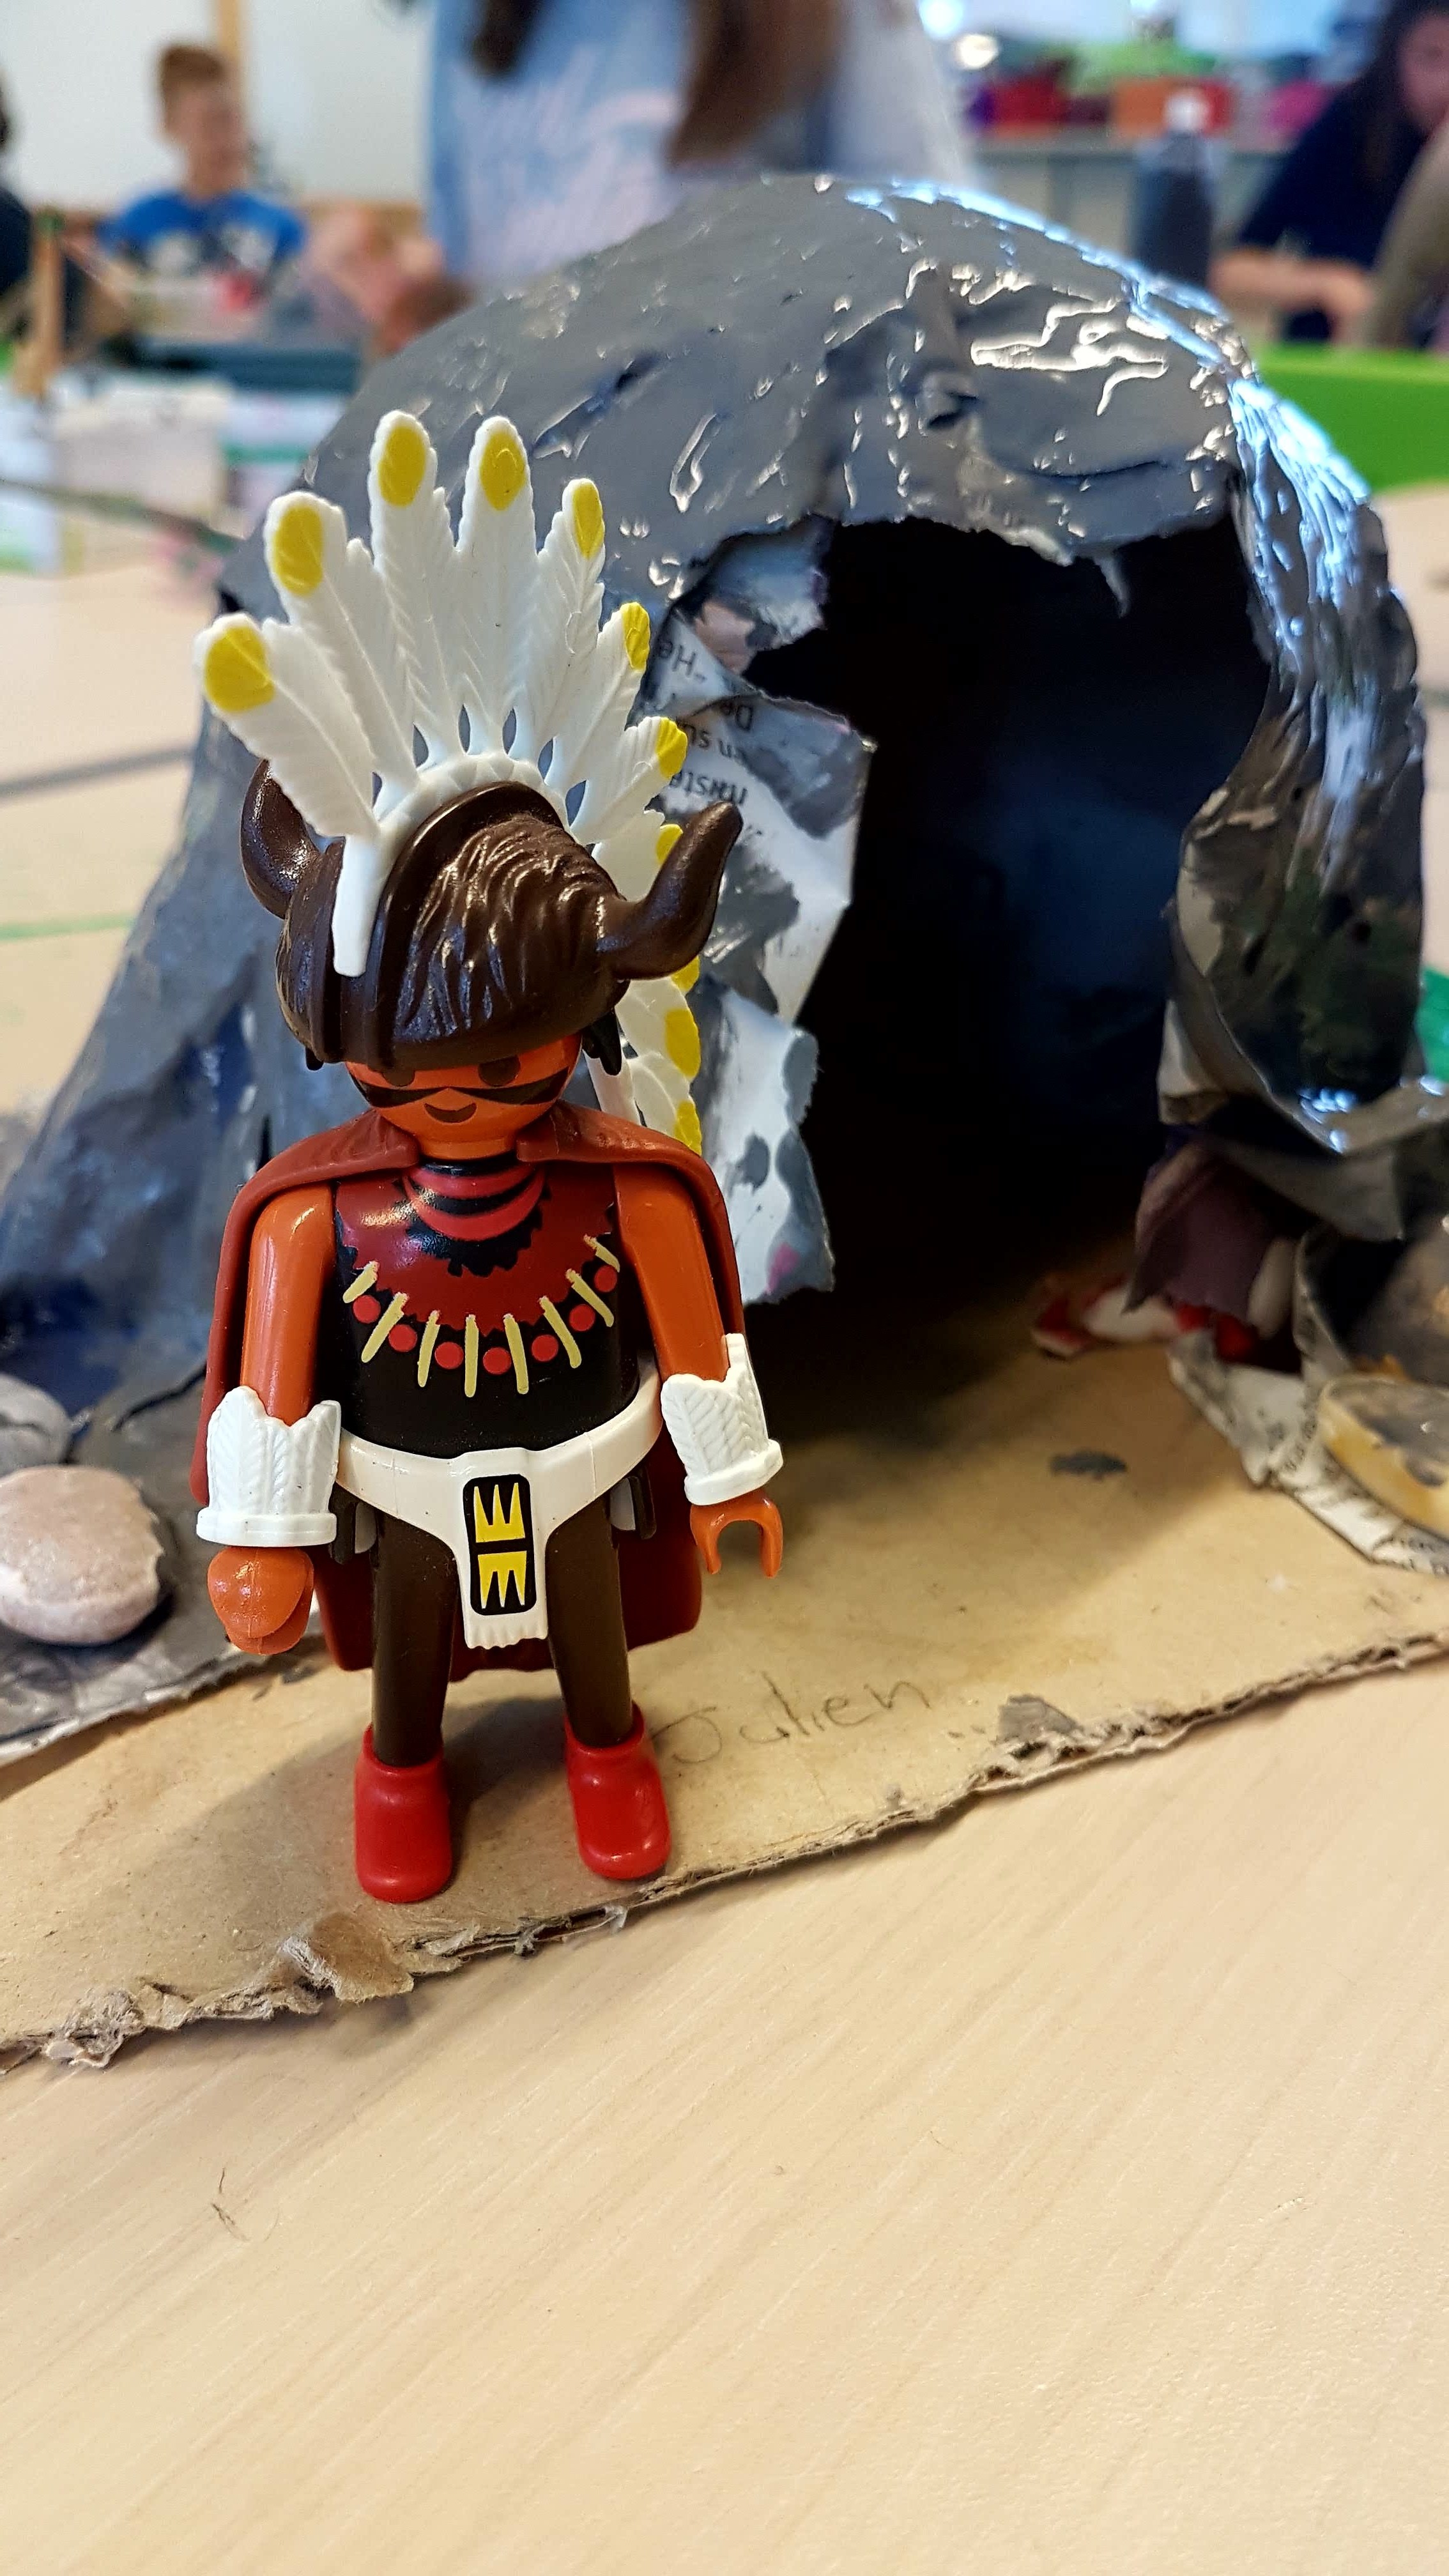
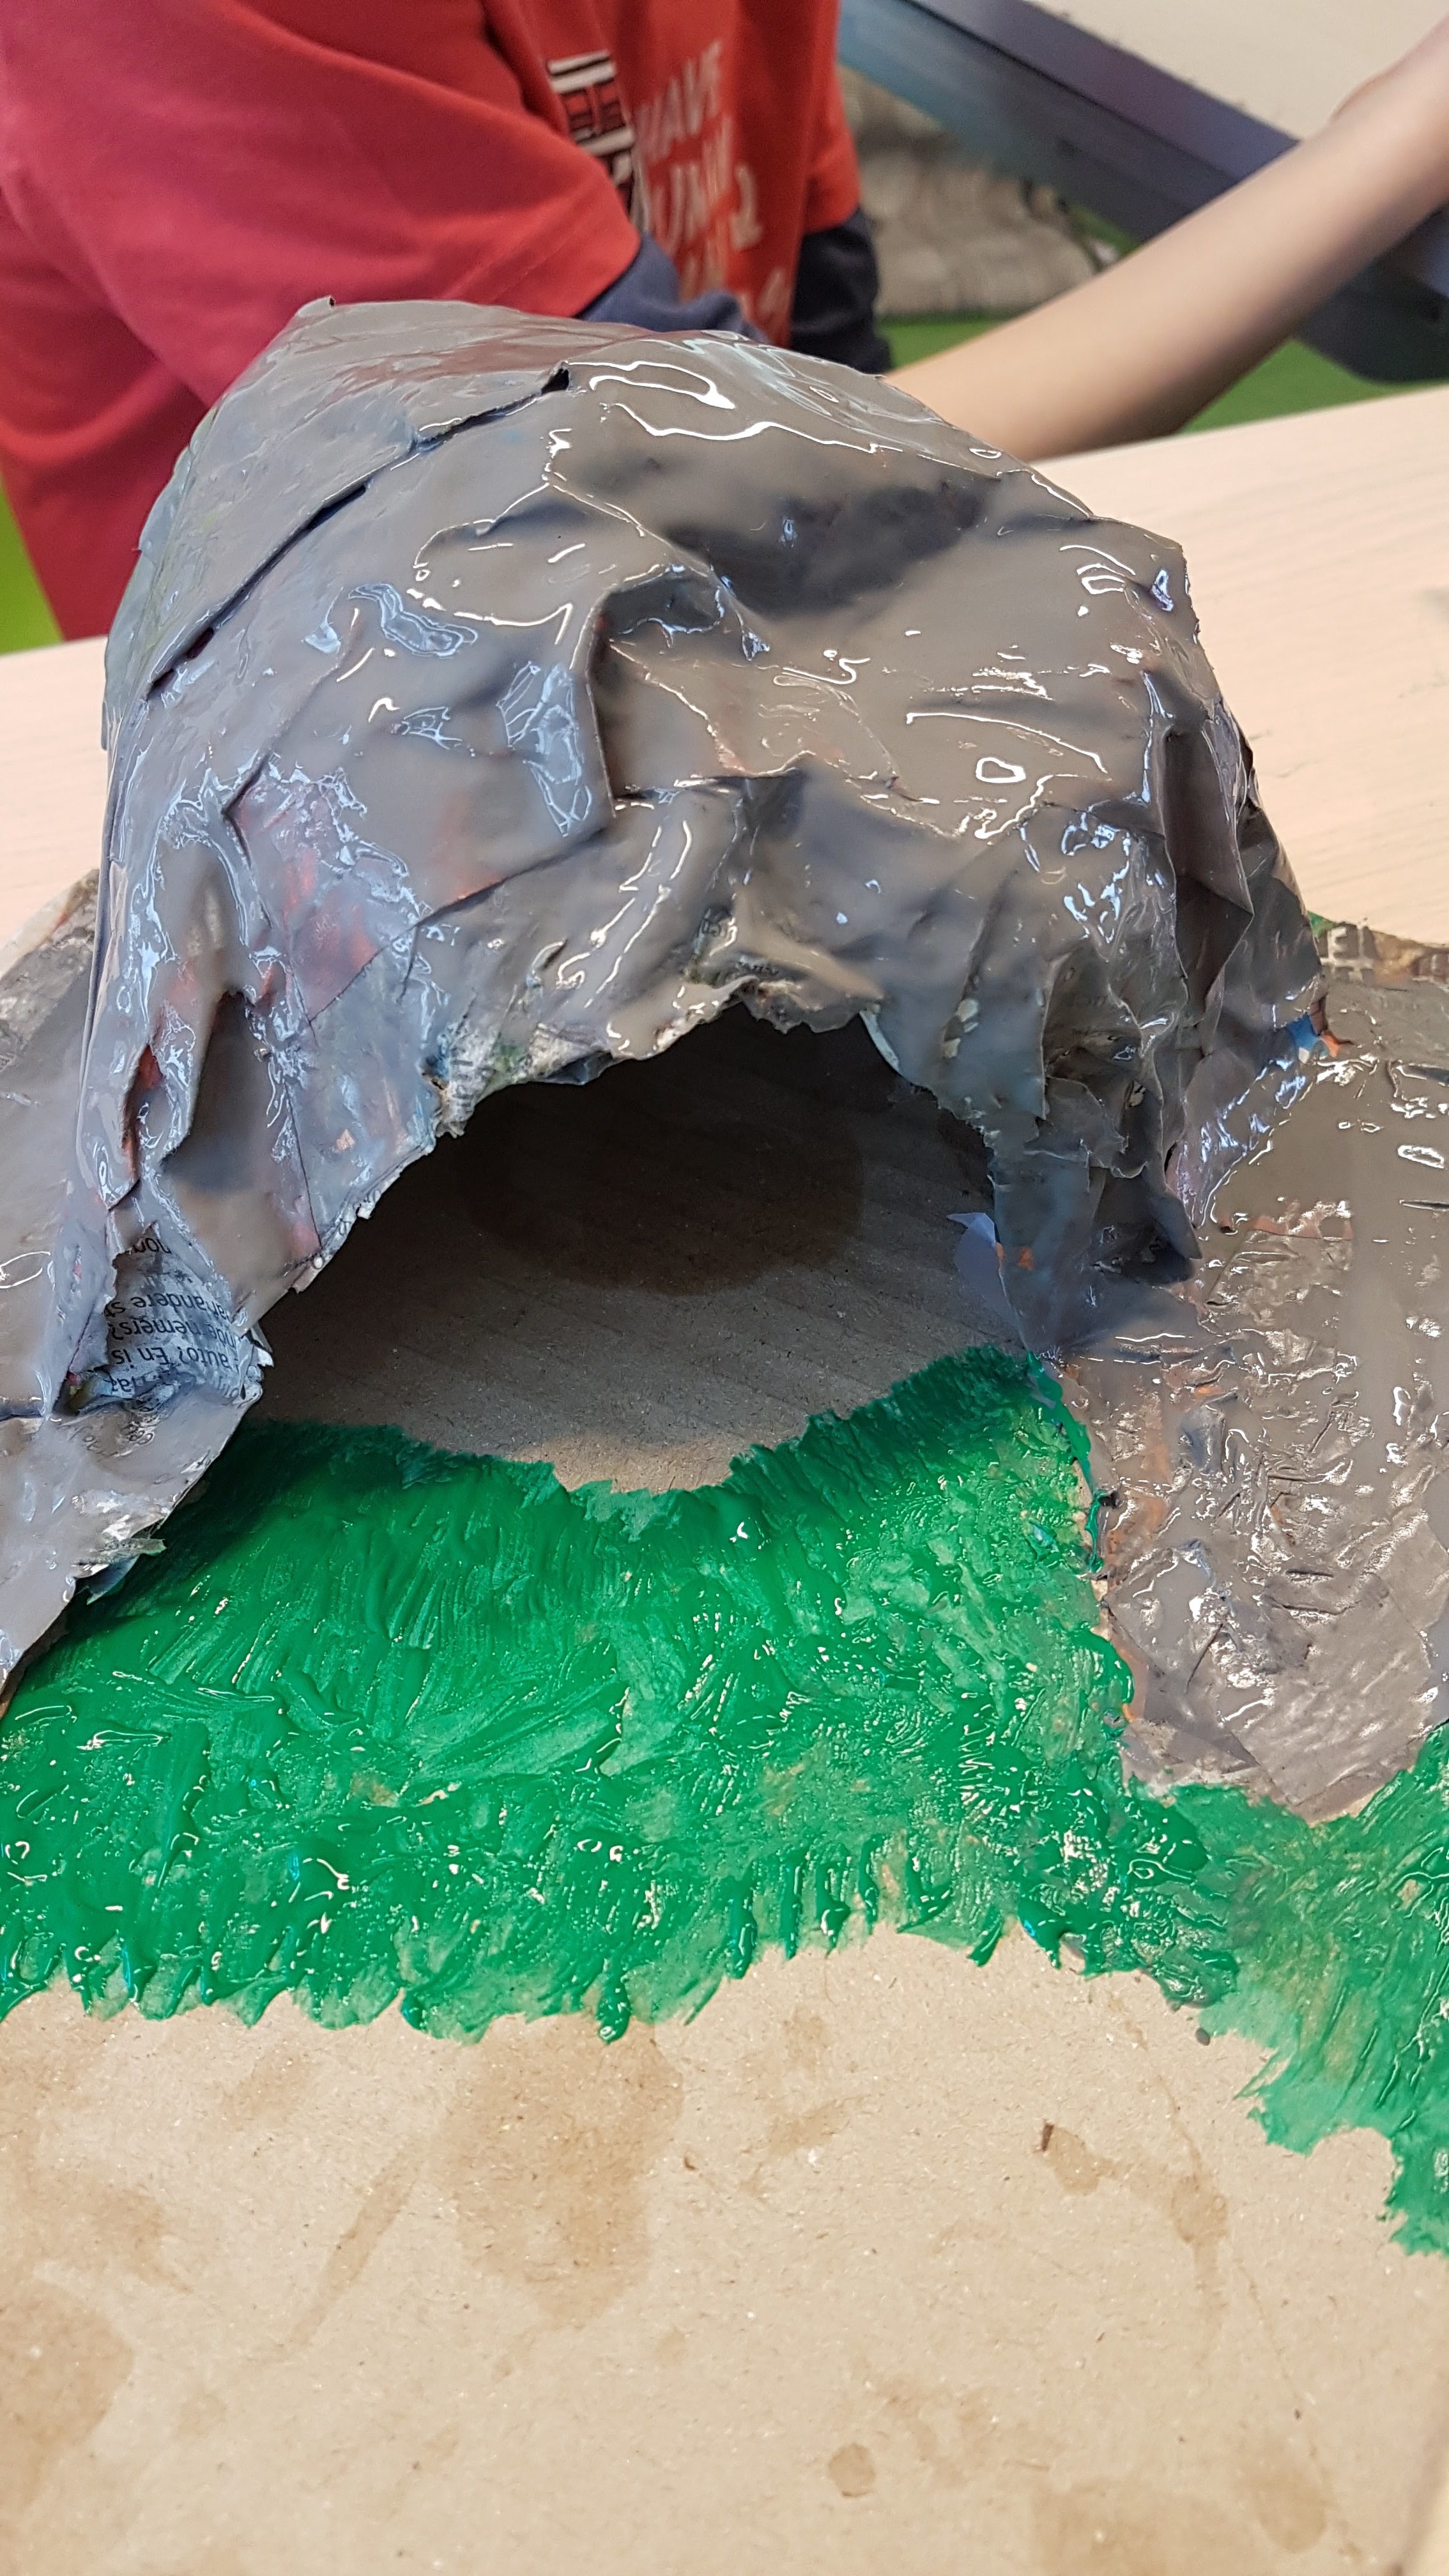
Above you can see from above. Here are some of the finished versions. I personally think they look fantastic.
To Conclude
This was a really worthwhile activity and it was a task the children really enjoyed. It is very clear they continue to enjoy their learning and have the key qualities and skills to be good learners. As a result, it is down to me as a teacher to both lead and facilitates positive learning outcomes for all abilities and this task just seemed to go hand in hand, with endless opportunities.
The overall outcome was clear to see. Happy, inquisitive minds, filled with confidence and a strong desire to learn more in future lessons.
You can read more of my Blog Posts here.

Adventure Calling
Remember... don't forget to check out David at Potty Adventures and Lauren at the Helpful Hiker.
The brains behind #adventurecalling